Smart Narrow Kitchen Layouts That Work in 2026
Smart layout strategies for narrow and galley kitchens — covering one-wall and two-wall configurations, vertical storage, lighting, and counter optimization.
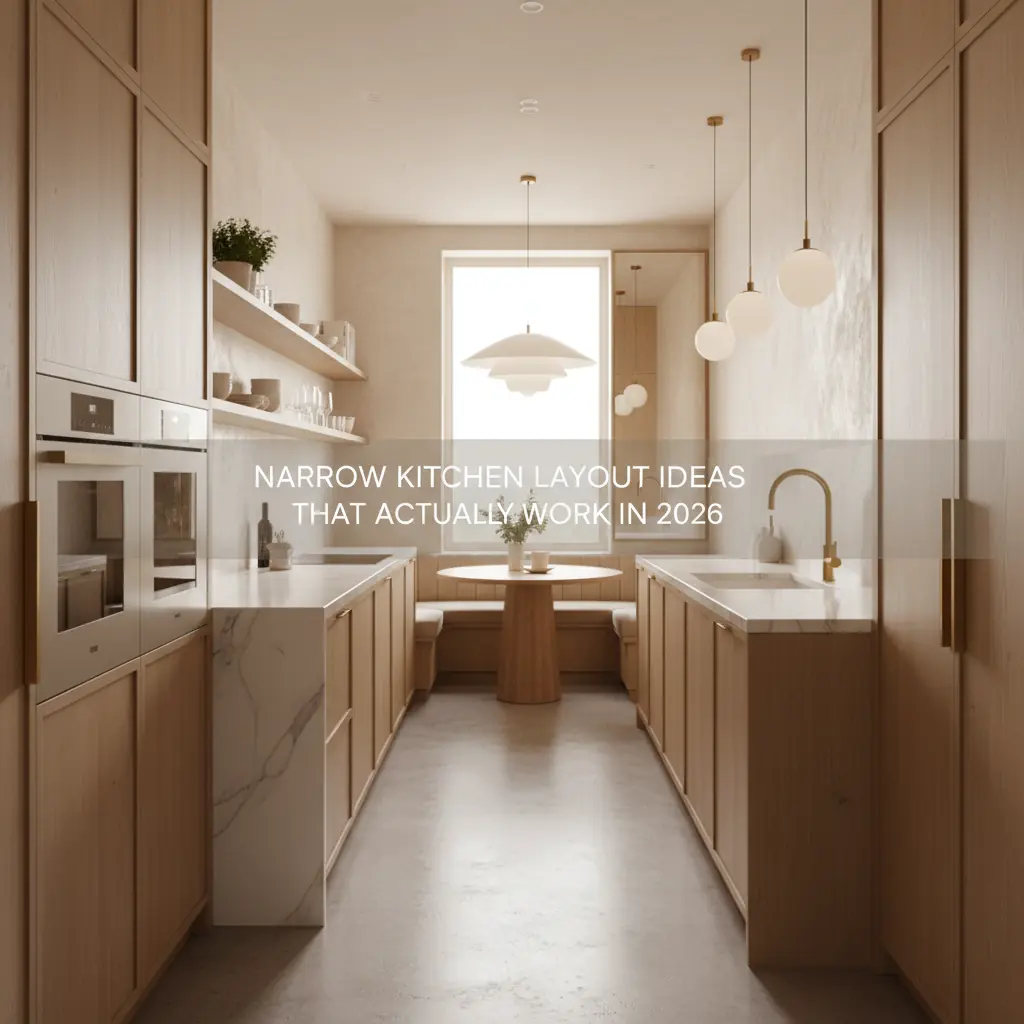
Understanding Your Narrow Kitchen Type: Galley vs. One-Wall
Navigating the constraints of a narrow kitchen doesn't have to mean sacrificing style or functionality. In fact, a well-designed narrow kitchen can be exceptionally efficient and surprisingly beautiful. For homes under 1,500 sq ft, it's common for kitchens to be less than 80 sq ft, underlining the importance of these space-saving strategies. The key to unlocking your narrow kitchen's full potential lies in accurately identifying its configuration and understanding the unique strategies applicable to it. Broadly, narrow kitchens fall into two main types: the galley and the one-wall.
**Galley kitchens** feature counters and cabinets on both sides of a central walkway, creating a corridor-like space. This layout is revered for its efficiency, often mirroring professional restaurant kitchens where every tool and ingredient is within easy reach. The challenge here is ensuring the walkway remains functional and uncrowded.
**One-wall kitchens**, on the other hand, consolidate all essential components—sink, stove, refrigerator, and cabinetry—along a single wall. The opposite side is typically open to a dining area, living room, or a clear passageway. This configuration excels at promoting an open, airy feel, but demands ingenious solutions for maximizing storage and counter space within its limited footprint.
The critical measurement influencing all design decisions is your **walkway width**. While building codes generally require a minimum of 36 inches of clear walkway in a residential kitchen, 42-48 inches is where the space begins to feel comfortable for a single cook. If two people frequently share the kitchen, 48 inches is the realistic minimum for comfortable movement. Before making any layout decisions, grab a tape measure. This crucial dimension will dictate whether you can accommodate opposing counters, a small island, or if a single-sided setup is your best bet.
If your existing galley kitchen walkway falls under 36 inches with cabinets on both sides, it's worth a serious consideration to convert to a one-wall layout. While losing half your counter space might sound daunting, the psychological and practical benefits of a functional walkway and the enhanced openness often make the kitchen feel twice as large and far more pleasant to use. This isn't just about utility; it's about transforming a cramped space into a comfortable one, a critical component of smart interior design, as explored in our guide to [awkward room shape solutions](/blog/awkward-room-shape-solutions).
Galley Kitchen Maximization: Efficiency in a Corridor
The galley layout, despite its narrowness, is actually celebrated for being one of the most efficient kitchen designs from a workflow perspective. Its linear nature allows for a tight work triangle – the strategic placement of the sink, stove, and refrigerator – ensuring that everything you need is within one or two steps. This is why professional kitchens often adopt a similar, highly optimized layout. In a typical galley, the work triangle often positions the sink and stove on one side (optimally sharing plumbing and gas lines), with the refrigerator on the opposite wall.
**Counter Space is Gold:** Every inch of counter space in a narrow galley is precious. You need practical landing zones: aim for at least 15 inches of counter on each side of the stove for setting down hot pans, and a minimum of 18 inches on one side of the sink for a drying rack or dedicated prep area. If standard 25-inch-deep counters make your walkway uncomfortably tight, consider a strategic compromise: reduce counter depth to 22 inches on one side. This small adjustment sacrifices 3 inches of prep surface but grants you 3 inches more in your walkway, which can feel transformative and significantly improve flow. This type of precise planning is where tools like Habitas can be invaluable, allowing you to visualize exact dimensions and their impact before committing to costly changes. Using an AI platform like Habitas can reduce design visualization time from weeks to minutes, saving design fees that can range from $500 to $5,000 for a single room, allowing homeowners to iterate on ideas quickly.
**Optimizing End Caps:** The short walls at each end of a galley kitchen are often overlooked but present prime opportunities for maximizing utility. Instead of leaving them blank, consider adding:
- A narrow, wall-mounted shelf for cookbooks or decorative items. - A magnetic knife strip, keeping knives safely stored and counters clear. - A wall-mounted spice rack, placing frequently used seasonings exactly where you need them. - A slim, wall-mounted desk or a drop-leaf table that can fold up for a quick meal.
These additions put storage and function exactly where you need it without encroaching on the precious walkway.
Unlocking Potential in One-Wall Kitchens
While often perceived as less functional, the one-wall kitchen layout offers a distinct advantage: openness. By consolidating all major elements onto a single wall, it frees up the surrounding space, making it ideal for open-concept living. The challenge here is to make that single wall work harder and smarter.
**Creating Zones:** Even on one wall, you can subtly define different work zones. Place the sink centrally, with the dishwasher adjacent. Flank it with sufficient counter space for prep. The refrigerator typically anchors one end, and the stove the other, creating a logical flow. If space allows, integrating pull-out pantries or cleverly designed appliance garages can vastly improve functionality without consuming additional footprint.
**The Illusion of Depth:** Since you lack opposing counters, focus on materials and design elements that create depth. A continuous backsplash running the entire length of the wall, even wrapping around the corner slightly if it meets a perpendicular wall, draws the eye and makes the wall feel longer. Incorporate open shelving on one end to lighten the visual load and showcase decorative items, or use glass-front cabinets.
**Adding Functional Extensions:**
- **Mobile Islands:** A slim, freestanding island on wheels can provide invaluable additional prep space or a temporary dining spot. It can be moved out of the way when not in use, offering the flexibility a fixed island cannot. - **Peninsula Extensions:** If your one-wall kitchen is at the end of a room, consider extending the counter into a peninsula. This provides extra counter space, seating, and can subtly define the kitchen area from the living space without a full wall. Explore how AI can help you with [AI furniture arrangement tool](/blog/ai-furniture-arrangement-tool) to test these layout ideas.
Vertical Storage and the Upper Cabinet Question
In any narrow kitchen, thinking vertically is non-negotiable. However, upper cabinets, while offering valuable storage, can create a visual "tunnel effect," making an already tight room feel even more constricted and claustrophobic. The modern design trend of removing upper cabinets entirely works beautifully in narrow kitchens – but only if your base cabinets and pantry storage can compensate adequately.
**Smart Upper Cabinet Alternatives:** If you can't afford to lose the storage, several compromises work well:
- **Open Shelving:** Replacing solid-door upper cabinets with open shelving immediately reduces visual bulk, allowing the eye to travel further. It also encourages curated displays, forcing you to keep things tidy. - **Glass-Front Cabinets:** These offer a middle ground, providing enclosed storage while still visually opening up the space. Use them for attractive dishware or glassware. - **Shallow Cabinets:** If space is extremely limited, consider installing shallower upper cabinets (10-12 inches deep instead of standard 14 inches) on one side of a galley, especially for items like glasses or spices.
**Reclaiming Dead Space:** Every nook and cranny can be a storage opportunity:
- **Inside Cabinet Doors:** Install spice racks, measuring cup hooks, or cleaning supply organizers on the inside of cabinet doors. - **Pull-Out Pantries:** A tall, narrow pull-out pantry (6-9 inches wide) can fit into surprisingly tight spots, such as between the refrigerator and a wall. These are perfect for spices, oils, canned goods, or broom storage. - **Ceiling-Mounted Pot Racks:** These keep cookware accessible without using precious cabinet space. In narrow kitchens, they typically work best positioned at the ends of the galley or above a dedicated cooking zone rather than in the center where they might impede movement. - **Pegboard or Wall-Mounted Rail Systems:** Systems like IKEA KUNGSFORS installed on the backsplash between upper and lower cabinets provide adjustable, visible storage for utensils, small pots, and frequently used tools. This keeps counters blessedly clear – a critical goal in a kitchen where every square inch of counter space matters.
Lighting That Widens the Space and Enhances Ambiance
Narrow kitchens often suffer from feeling dark and cramped, largely due to inadequate or poorly planned lighting. A single, central ceiling fixture casts shadows precisely where you need light most – on your countertops. Strategic lighting can not only brighten the space but also create the illusion of width and depth.
**High-Impact Lighting Upgrades:**
- **Under-Cabinet LED Strips:** These are arguably the highest-impact lighting upgrade for any narrow kitchen. They directly illuminate your work surfaces, eliminate shadows cast by upper cabinets, and add a warm, inviting ambient glow that instantly makes the space feel larger and more welcoming. - **Recessed Ceiling Lights:** For general illumination, 4-inch recessed ceiling lights (can lights) spaced evenly down the center of the walkway provide uniform, unobtrusive light without hanging fixtures that can lower the ceiling plane visually. - **Pendant Lights (Used Sparingly):** If your ceiling height is generous (8 feet or more), a pair of small, visually light pendant lights can add visual interest over a specific zone, such as a small breakfast bar at the end of a galley or a designated prep area. Position them carefully to avoid obstructing the walkway. - **Toe-Kick Lighting:** Subtle LED strips installed beneath base cabinets can create a soft glow along the floor, making the cabinets appear to float and adding an unexpected layer of depth and sophistication.
**Leveraging Natural Light:** If your narrow kitchen has a window, prioritize keeping it unobstructed. Simple window treatments like roller blinds or sheer Roman shades are preferable to heavy curtains. If natural light is limited, incorporating task lighting and reflective surfaces becomes even more crucial.
Color and Material Tricks to Widen Perception
The impact of color and material choices on perceived space cannot be overstated in a narrow kitchen. Light colors on walls and cabinets are a well-established trick to make rooms feel more expansive, but the specific application matters. Studies show that light-colored kitchens can feel up to 20% larger than those with dark palettes, a significant visual gain in tight spaces.
**Monochromatic Magic:** If you paint walls and cabinets the same light color – think crisp white, pale gray, soft sage, or a creamy off-white – the boundaries between these elements dissolve. The kitchen then reads as one continuous, flowing space rather than a collection of separate boxes. This "same-color trick" is one of the most effective visual expanders available. Consider exploring different hues with an [AI color palette generator](/blog/ai-color-palette-generator). For a classic, bright look, you might also find inspiration in [all-white room design tips](/blog/all-white-room-design-tips).
**Flooring for Flow:**
- **Direction Matters:** Lay planks (wood or LVT) or rectangular tiles perpendicular to the long axis of the kitchen (across the narrow dimension) to visually draw the eye across the room, making it feel wider. - **Large-Format Tiles:** Using larger floor tiles (e.g., 12x24 inches or larger) reduces the number of grout lines, minimizing visual clutter and contributing to a more expansive feel. - **Continuous Flooring:** If your kitchen opens into an adjacent room, using the same continuous floor material seamlessly connecting the spaces eliminates the visual break that often makes a narrow kitchen feel like a separate, tight corridor.
**Reflective Surfaces for Depth:**
- **Glossy Backsplashes:** Materials like glossy subway tile, polished porcelain, or glass tiles reflect light, bouncing it around the room and creating a sense of depth. - **Mirrored Backsplashes:** While bold, a mirrored backsplash can dramatically double the perceived width of a narrow kitchen, especially when positioned to reflect a window or light source. - **Stainless Steel:** Stainless steel appliances and backsplashes also offer reflective properties and a modern, sleek aesthetic that reduces visual clutter.
**Habitas for Visualization:** This is where Habitas truly shines. You can upload a photo of your current kitchen and, with a few clicks, visualize how different material and color combinations would look. Compare a dark-cabinet variant against a light one, test different flooring options, or see the impact of a reflective backsplash to truly understand the difference in _your specific space_ before making any expensive decisions. This powerful [AI interior design how it works](/blog/ai-interior-design-how-it-works) in practice.
Counter Space Optimization: Maximizing Every Surface
In a narrow kitchen, counter clutter is more than just unsightly; it actively diminishes your available workspace and makes the room feel smaller and more chaotic. The goal is ruthless efficiency and smart utilization of every square inch.
**The Appliance Rule:** Adopt a strict rule: only the items you use daily (e.g., coffee maker, knife block, maybe a toaster) earn a permanent spot on the counter. Everything else – stand mixer, blender, food processor, waffle maker – goes into a cabinet or pantry and comes out only when needed.
**Flexible Work Surfaces:**
- **Portable Butcher Block Carts:** A sturdy butcher block cart on wheels serves as invaluable overflow counter space during cooking. It can be wheeled into the center of a galley kitchen for prep and then pushed against a wall or into an adjacent dining area when not needed. Look for carts around 24x18 inches – narrow enough to fit without obstructing most walkways. - **Over-the-Sink Cutting Boards:** These custom-fit cutting boards rest directly over your sink, creating temporary, highly convenient prep space exactly where you need it. They typically collapse flat or store vertically, making them ideal for small kitchens. - **Integrated Solutions:** Consider having a custom cutting board designed to slide over a pull-out trash bin or a designated cutting board slot within your cabinetry.
**Dual-Purpose Elements:**
- **Wall-Mounted Folding Tables or Drop-Leaf Extensions:** At the end of a galley or a one-wall kitchen, a wall-mounted folding table can provide a much-needed eat-in option without permanently occupying floor space. When folded, they might be just 3-4 inches deep, flush against the wall. When extended, they can comfortably seat two for breakfast or a quick meal. This dual-use approach is what truly makes narrow kitchens livable and functional, not just practical. - **Appliance Garages:** If you have deeper base cabinets or can build one, an appliance garage is a cabinet section with a retractable door (like a tambour door) that keeps small appliances tucked away but easily accessible when needed, preserving precious counter space.
A minor kitchen remodel typically yields an ROI of 70-80% at resale, making smart design choices a valuable investment, especially considering the average kitchen remodel cost in the US ranges from $20,000 to $60,000. Investing in smart, space-saving design is not just about daily convenience; it's about maximizing your home's value.
Frequently Asked Questions
### What is the best layout for a narrow kitchen?
The "best" layout depends on your kitchen's specific dimensions and how it connects to other rooms. For maximum efficiency, a **galley layout** with appliances forming a tight work triangle (sink, stove, fridge) is often superior, especially for one cook. If the kitchen opens into a living space, a **one-wall layout** offers greater psychological openness, freeing up the opposite wall for circulation or integration with the dining area. Prioritize sufficient walkway width (at least 36-42 inches) above all else.
### How can I make a narrow kitchen look bigger?
Several design tricks can dramatically enhance the perception of space in a narrow kitchen. Use a monochromatic color scheme with **light colors** (white, pale gray, soft pastels) for walls, cabinets, and even countertops to create a seamless, expansive feel. Incorporate **reflective surfaces** like glossy backsplashes, glass-front cabinets, or even a large mirror at the end of a galley to bounce light and add depth. Lay **flooring planks perpendicular** to the long axis of the room, and use continuous flooring from the kitchen into adjacent spaces. Optimize lighting with under-cabinet LEDs and recessed ceiling lights to brighten every corner.
### Can you put an island in a narrow kitchen?
Generally, a traditional, fixed island is **not recommended** for truly narrow kitchens as it can severely obstruct the essential walkway. To maintain code-compliant and comfortable clearance (minimum 36-42 inches around all sides), most narrow kitchens simply don't have the width. However, you can use **mobile butcher block carts on wheels** or **slim, rolling islands** (often 18-24 inches deep) that can be moved into place for prep and then pushed aside when not in use. A **peninsula extension** from a one-wall kitchen is another viable option that offers island-like functionality without demanding central floor space.
### What are the best storage solutions for a small, narrow kitchen?
Maximizing vertical space and incorporating smart pull-outs are key. Consider **tall, narrow pull-out pantries** (6-9 inches wide) for spices or canned goods. Install **magnetic knife strips** and **wall-mounted rail systems** for utensils and frequently used tools to keep counters clear. Use **inside-cabinet-door organizers** for spices, cleaning supplies, or measuring cups. Replace some upper cabinets with **open shelving or glass-front cabinets** to reduce visual bulk while maintaining storage. Overhead pot racks (placed strategically) and multi-functional sink accessories also help free up space.
### What is the minimum walkway width for a functional kitchen?
Building codes typically require a **minimum of 36 inches** of clear walkway in a residential kitchen. However, this is a bare minimum. For comfortable single-cook use, aim for **42 inches**. If two people will frequently cook simultaneously, **48 inches** is the realistic minimum to allow for movement, opening appliance doors, and passing without collision. Always measure your existing or planned walkway width carefully before finalizing your layout.