Mastering Real Estate Photography & Staging: Your Ultimate Listing Guide
A complete guide to real estate photography and staging — from camera settings to photo ordering in your listing.
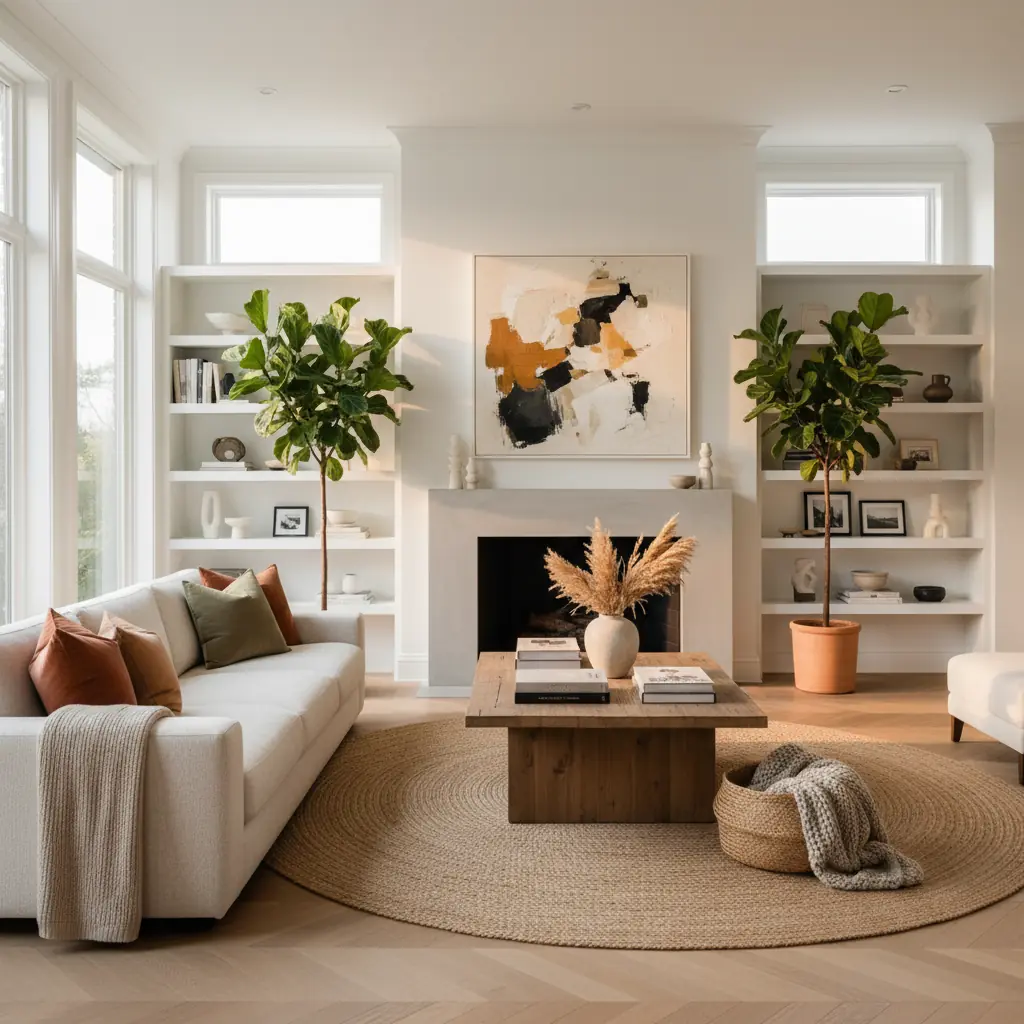
Why are high-quality photos essential for real estate listings?
In today's digital-first market, a property's first showing almost always happens online. High-quality real estate photography isn't just a nicety; it's a necessity that directly impacts buyer interest, perceived value, and ultimately, sale speed. Professional photos make a property stand out in crowded search results, capturing attention and drawing potential buyers in for a closer look. They create an emotional connection before a physical visit, showcasing not just a house, but a potential home. Listings with high-quality photographs can sell up to 32% faster than those with poor-quality images, and often for a higher price.
Photography basics every agent should know for stunning visuals
Great listing photos start with three fundamental elements that lay the groundwork for a professional presentation: a wide-angle lens, a sturdy tripod, and strategic timing for optimal lighting.
### Choosing the right equipment: Camera, lens, and tripod
For capturing expansive interior shots, a wide-angle lens is indispensable. On a full-frame camera, a focal length between 16-24mm is ideal, allowing you to capture more of the room without excessive distortion. If using a crop-sensor camera, aim for a lens that gives you an equivalent wide-angle view (e.g., a 10-18mm lens). This wider perspective makes rooms appear larger and more inviting, providing a better sense of space.
A sturdy tripod is equally critical. It ensures sharp images by eliminating camera shake, especially in lower light conditions where longer exposure times are needed. It also allows for consistent camera positioning between shots, which is crucial for creating cohesive virtual tours or for blending multiple exposures (HDR).
### Mastering natural and artificial light
The right time of day profoundly influences the mood and quality of your photos. Golden hour — the hour after sunrise or before sunset — provides warm, flattering light that makes interiors glow and exteriors pop with rich colors. However, for interior shots, direct sunlight can be a double-edged sword, often creating harsh shadows and blown-out windows. Overcast days actually produce the most even interior lighting, diffusing sunlight beautifully and minimizing stark contrasts.
When natural light isn't sufficient, strategically turn on every light in the home. Use lamps, overhead fixtures, and under-cabinet lighting. While this may seem excessive to the naked eye, the camera often needs this additional illumination to brighten shadows and create a more inviting atmosphere.
### Essential camera settings and composition techniques
Beyond equipment, understanding basic camera settings and composition rules will elevate your photography.
- **Aperture (f-stop):** For real estate, you typically want most of the room in focus, so a higher f-stop (e.g., f/8 to f/11) is recommended. This provides a greater depth of field. - **ISO:** Keep your ISO as low as possible (e.g., 100-400) to minimize noise and grain, especially when using a tripod. - **Shutter Speed:** Adjust your shutter speed to achieve proper exposure, compensating for your chosen aperture and ISO. A tripod allows for longer shutter speeds without blur. - **White Balance:** Ensure colors are accurate. Use your camera's white balance presets (e.g., 'Daylight,' 'Cloudy,' 'Tungsten') or custom white balance to avoid unnatural color casts.
For composition, shoot from corners whenever possible, aiming diagonally across the room. This maximizes the visible space, creates leading lines, and gives depth to the image. Set your camera height at about 48 inches — roughly chest height — which provides the most natural perspective, mimicking how a person would view the room when standing. Shooting too low makes rooms look distorted and can emphasize ceilings, while shooting too high makes them feel small and can show too much floor. Employ the rule of thirds to place interesting elements along intersecting lines, creating a more balanced and engaging image.
Preparing rooms for the camera: The art of staging and decluttering
What looks fine in person often looks terrible in photos. The camera is less forgiving than the human eye and accentuates clutter and imperfections. Thorough preparation is paramount.
### The pre-shoot checklist: Declutter, clean, and depersonalize
Before even thinking about snapping a photo, meticulously prepare each space:
- **Declutter ruthlessly:** Remove all small appliances from kitchen counters, clear bathroom vanities, and put away personal items like mail, remote controls, and magazines. Hidden clutter (inside closets or drawers) is fine, but anything visible should be minimized. - **Deep clean:** A sparkling home signals good maintenance. Clean windows, floors, countertops, and appliances. - **Depersonalize:** Remove family photos, religious items, and highly personal decor. Buyers need to envision themselves living in the space, and too much personal clutter makes that difficult. - **Minor repairs:** Fix leaky faucets, replace burnt-out light bulbs, and touch up chipped paint. These small details can make a big difference in the overall perception of the home's condition.
### Strategic styling: Enhancing appeal with subtle touches
Once decluttered and cleaned, enhance the room's appeal with strategic styling:
- **Kitchens:** Close all toilet lids, turn off all TVs and computer screens (they create distracting glare), and hide all visible cords and cables. Set each room with one or two lifestyle touches: an open book on the nightstand, a cutting board with fresh herbs or a bowl of fresh fruit in the kitchen, a folded throw on the couch. - **Bathrooms:** Ensure toilet lids are closed, towels are freshly folded and neatly hung, and all personal toiletries are out of sight. Add a simple decorative plant or a scented candle for a spa-like feel. - **Living Rooms:** Arrange furniture to maximize flow and conversation areas. Use throw pillows and blankets to add texture and color. Consider a vase of fresh flowers on a coffee table. - **Bedrooms:** Make beds immaculately, with crisp linens and plump pillows. Open curtains wide to let in natural light. - **Floors:** Remove floor mats and small rugs that can look cluttered or create odd angles in wide-angle shots.
Turn on every light in the home and open all blinds and curtains. Even if the room feels "bright enough" to your eyes, photos benefit from maximum light, creating an airy and expansive feel.
Photo editing ethics: Enhancement vs. misrepresentation
Digital editing is a powerful tool, but it comes with ethical boundaries. The goal is to enhance, not deceive.
### What's acceptable in real estate photo editing?
Basic editing is expected and acceptable, as these adjustments aim for accuracy and visual appeal without altering the fundamental nature of the property:
- **White Balance Correction:** Adjusting colors to appear natural, removing yellow or blue casts. - **Lens Distortion Correction:** Fixing wide-angle lens barrel distortion to make lines appear straight. - **Brightness/Contrast Adjustment:** Brightening shadows, darkening highlights, and adjusting overall exposure to make the image clear and vibrant. - **Window Pulls (HDR blending):** Combining multiple exposures to reveal both the interior of the room and the view outside the windows, preventing blown-out skies or dark interiors. This is standard practice and accurately represents what a human eye would see. - **Minor object removal:** Removing a small, non-permanent item like a stray power cord or a temporary sign.
These are standard practices that accurately represent the property in its best light.
### Where to draw the line: Avoiding misrepresentation
Removing permanent features, altering structural elements, or concealing damage crosses into misrepresentation. This includes:
- Removing power lines, neighboring buildings, or unsightly permanent fixtures outside the property. - Digitally removing a cracked foundation, water stains, mold, large holes, or other significant damage. - Adding features that don't exist (e.g., a fireplace, a large tree, a new fixture). - Altering the size or scale of rooms or features.
The rule of thumb: if a buyer would notice the difference during a showing, you have gone too far. Misrepresenting a property can lead to legal issues, damage an agent's reputation, and ultimately waste buyers' time. Always prioritize transparency.
Virtual staging for empty or outdated spaces: Unlocking potential
Empty rooms photograph poorly. Without furniture for scale, buyers cannot gauge room sizes, and vacant homes often feel cold, uninviting, and lack imagination. Virtual staging solves this challenge, transforming empty spaces into warm, furnished homes, or showcasing the potential of outdated ones.
### The benefits of virtual staging
Virtual staging offers significant advantages over traditional physical staging:
- **Cost-effectiveness:** Virtual staging costs a fraction of physical staging, which can run into thousands of dollars for furniture rental and setup. A typical virtual staging project might cost $30-$100 per image, compared to $500-$5,000+ for physical staging. - **Flexibility:** Easily change styles, colors, and furniture arrangements to appeal to different buyer demographics without physical effort. - **Speed:** Modern AI tools produce results that are nearly indistinguishable from real photography in a matter of minutes or hours, rather than days or weeks for physical staging. - **Accessibility:** Perfect for homes in remote locations or those that need to be listed quickly.
### Transforming vacant homes with AI
Modern AI tools have revolutionized virtual staging. Platforms like Habitas can take an empty room photo and fill it with stylish, realistic furniture and decor that matches a chosen aesthetic. This helps buyers visualize themselves in the space, understand its scale, and feel a connection. Studies show that 73% of home buyers say staging helps them visualize a property as their future home, and virtual staging achieves this impact without the logistical hurdles of physical furniture. For a deeper dive into how AI makes this possible, explore our guide on [how AI interior design works](/blog/ai-interior-design-how-it-works).
### Redesign visualizations for dated but livable spaces
For dated but livable spaces – think avocado-green countertops, wood-paneled walls, or shag carpets – a different approach works well. Shoot the existing room as is, then use tools like Habitas to generate redesign visualizations. These tools can digitally update elements like paint colors, flooring, cabinetry, and furniture, showing buyers the property's potential.
Pairing "current" photos with "possible" renderings helps buyers see past cosmetic issues to the home underneath. It provides a vision for what the space _could_ be, inspiring confidence and allowing them to estimate renovation potential without having to imagine it from scratch. This strategy is particularly effective because it addresses common buyer objections upfront and gives them a clear path to modernizing the home. To see the power of these transformations, check out [AI interior design before and after examples](/blog/ai-interior-design-before-and-after).
How many photos should a listing have and in what order?
The number and order of photos are critical to maintaining buyer engagement and conveying the property's narrative effectively.
### The optimal number of listing photos
Research from major real estate platforms like Redfin and Zillow consistently shows that listings with 25 to 35 photos receive the most engagement. This range provides a comprehensive visual tour without overwhelming the buyer.
- **Fewer than 20 photos** suggests the agent is hiding something or hasn't fully captured the property's essence. - **More than 40 photos** can create fatigue and dilute impact — buyers often stop paying attention after photo 35, especially if many images are redundant or of minor features.
Aim for a curated selection that highlights every key area and unique feature.
### Crafting a compelling photo sequence
Photo order matters enormously. The sequence should tell a story, moving logically through the property as if on a guided tour.
1. **Lead with your strongest exterior shot:** This is often the front of the home, captured at an ideal time (e.g., golden hour), showcasing curb appeal, landscaping, and the overall impression. This is your "hero shot" and typically accounts for about 60% of clicks. 2. **Transition to key interior living spaces:** Follow with the living room, then kitchen, then master bedroom. These are the most important rooms for buyers. 3. **Group rooms logically:** Present all kitchen photos together, then all dining room photos, then all bathroom photos. This creates a smooth flow and prevents disorientation. 4. **Include essential spaces:** Don't forget secondary bedrooms, guest bathrooms, home offices, and utility spaces. 5. **Highlight unique features:** Showcase any special architectural details, built-ins, or smart home technology. 6. **End with exterior amenities:** Conclude with photos of the backyard, pool, patio, garage, and any community features.
The first five photos are the most crucial, determining whether a buyer clicks "Schedule Showing" or moves on to the next listing. They should be compelling enough to hook the viewer immediately.
Hiring a photographer vs. doing it yourself: Making the right choice
Deciding whether to hire a professional or tackle real estate photography yourself depends on several factors, including your budget, the property's value, and your personal skill level.
### When to invest in a professional real estate photographer
Professional real estate photographers typically charge $150 to $500 per property and deliver 25 to 40 expertly edited images within 24 to 48 hours. For any listing above $300K, this is an obvious and highly recommended investment. The cost is negligible relative to the potential commission and the significant impact on sale price and speed. Homes with professional staging and photography can sell for 6-10% more than comparable unstaged homes.
Professionals bring not only high-end equipment but also specialized skills in composition, lighting, and post-processing (including complex HDR blending for windows). They understand how to make a room look its best and how to ethically enhance images to appeal to buyers. Their expertise ensures consistent quality, saving you time and stress, and ultimately driving more leads. When considering the return on investment, a professional photographer is almost always a worthwhile expense for higher-value properties.
### Tips for the DIY real estate agent photographer
If you are shooting listings yourself, especially for lower-priced properties or if you're just starting out, investing in a used mirrorless camera with a wide-angle lens is a smart move (total cost around $600 to $800). Even the best phone cameras cannot match the dynamic range, low-light performance, and true wide-angle perspective of a dedicated camera with a proper lens.
However, technique matters more than equipment. A modern iPhone or Samsung in the right hands will outperform a DSLR in the wrong hands. If you're going the DIY route:
- **Learn your equipment:** Understand your camera's settings (aperture, ISO, shutter speed) and practice. - **Use a tripod:** Essential for sharp, consistent shots. - **Master lighting:** Avoid direct flash and harsh shadows. Maximize natural light and turn on all interior lights. - **Edit carefully:** Learn basic photo editing software to correct white balance, exposure, and lens distortion. Adhere strictly to ethical guidelines. - **Study professional work:** Look at top-tier listings for inspiration on composition, staging, and lighting.
Ultimately, whether you hire a pro or do it yourself, the goal remains the same: to create stunning, truthful images that captivate buyers and showcase the full potential of every property.
Frequently Asked Questions
### What's the most important tip for real estate photography?
The single most important tip is to prioritize good lighting and wide, clean shots. Maximize natural light by opening all blinds and curtains, turn on every artificial light source, and shoot with a wide-angle lens from a corner perspective at chest height (around 48 inches). These elements combine to make rooms feel more spacious, inviting, and accurately represented.
### How much does professional real estate photography cost?
Professional real estate photography typically costs between $150 and $500 per property, depending on the home's size, location, and the photographer's experience. This fee usually includes 25-40 edited digital images delivered within 24-48 hours. For listings over $300,000, this investment often pays for itself in faster sales and higher offers.
### Is virtual staging ethical and effective?
Yes, virtual staging is both ethical and highly effective when disclosed properly. It transforms empty or outdated spaces into warm, appealing visuals, helping buyers visualize a property's potential and how they might live in it. It's particularly useful for vacant homes or those needing significant renovation. Studies show virtually staged homes receive significantly more interest and sell faster than unstaged vacant properties. Always include a disclaimer that images are virtually staged.
### What are the biggest mistakes to avoid in real estate photography?
The biggest mistakes include poor lighting (too dark, harsh shadows), blurry images, unflattering angles (shooting too low or too high), excessive clutter, personal items visible, and over-editing that misrepresents the property. Using a smartphone without a wide-angle lens and proper technique is also a common pitfall. Always focus on clarity, cleanliness, and an accurate, appealing representation.