Desbloquea tu Visión: Crea el Mood Board de Diseño de Interiores Perfecto
Domina la planificación del diseño de interiores con nuestra guía paso a paso para crear un mood board. Descubre cómo recopilar inspiración, definir tu estilo, armar tu tablero y validar tu visión con herramientas de IA como Habitas.
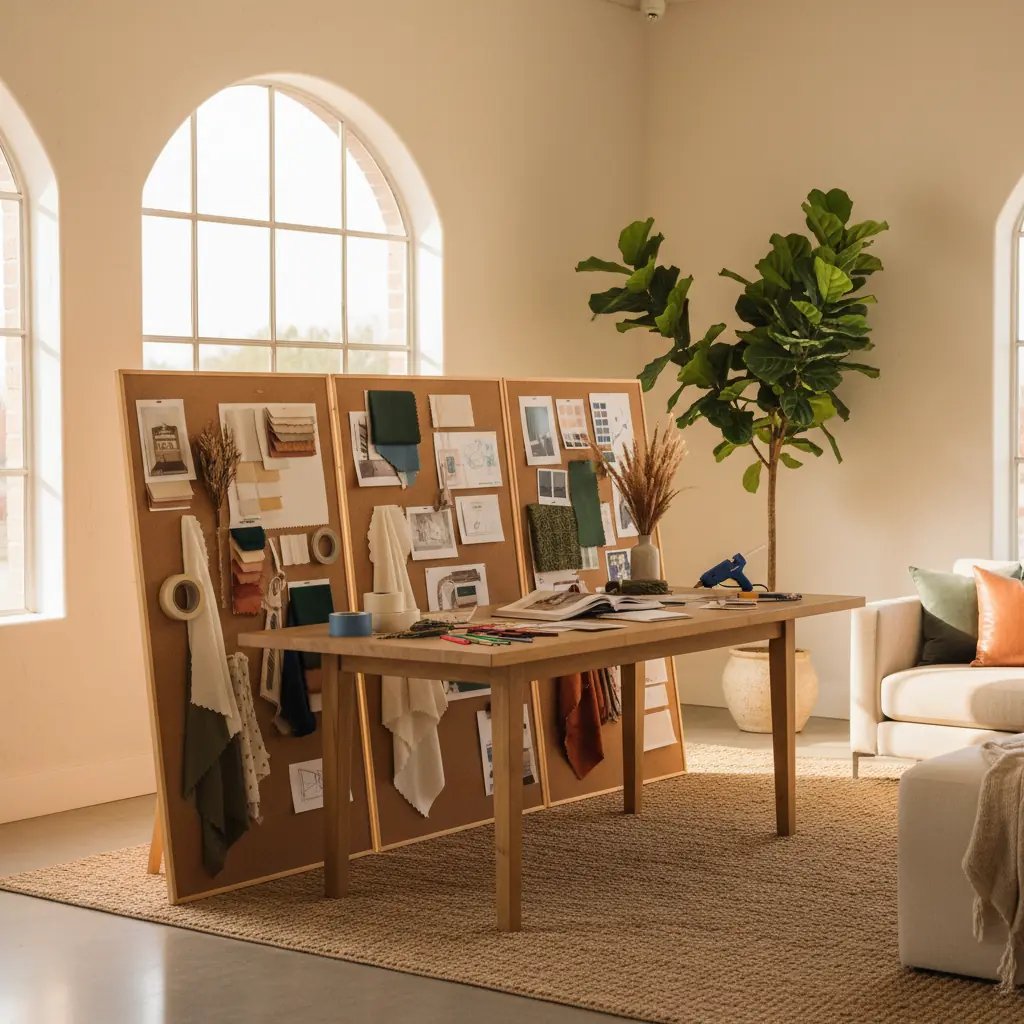
¿Qué es un Mood Board de Diseño de Interiores y Por Qué te Ahorra Dinero y Estrés?
Un mood board de diseño de interiores es más que un simple collage; es una colección meticulosamente curada de imágenes, colores, texturas y materiales diseñada para comunicar la esencia emocional y la visión funcional que quieres que encarne una habitación. Lejos de ser una mera lista de compras o un plano preciso, funciona como la declaración visual definitiva para toda tu dirección de diseño. Piensa en él como tu estrella polar inquebrantable, guiando cada decisión y evitando que te desvíes del camino cuando te tientan las tendencias efímeras o las ofertas atractivas.
El profundo valor de un mood board bien elaborado radica principalmente en su poder para prevenir errores costosos y la abrumadora parálisis del diseño. Sin este paso fundamental crucial, los propietarios a menudo se encuentran haciendo compras impulsivas de muebles que chocan, seleccionando colores de pintura que compiten con su piso existente, o terminando con habitaciones que se sienten como un surtido aleatorio de artículos bonitos pero inconexos. Estos errores a menudo conducen a costosas devoluciones, recompras y el desgaste emocional de un espacio que nunca se siente del todo bien.
Un mood board diligentemente construido detecta estos posibles conflictos _antes_ de que gastes un solo dólar o te comprometas con cambios importantes. Te obliga a visualizar la cohesión, anticipar desafíos y tomar decisiones intencionales. Los profesionales del diseño de interiores concuerdan ampliamente en que integrar una sólida fase de mood board en un proyecto puede ahorrar a los clientes entre el 15 y el 30 por ciento de su presupuesto total, con muchos proyectos viendo ahorros promedio cercanos al 20% o incluso hasta $5,000 en una renovación de habitación de rango medio. Esto no se trata solo de dinero; se trata de ahorrar tiempo, reducir el estrés y asegurarte de invertir en un hogar que realmente ames.
Paso 1: Cómo Recopilar Inspiración Ampliamente y Luego Editar Sin Piedad
El viaje hacia tu habitación perfecta comienza con una inspiración ilimitada. Empieza guardando absolutamente todo lo que te llame la atención, sin ningún filtro o juicio inicial. Sumérgete en los tesoros visuales de plataformas como Pinterest e Instagram, pero no te detengas ahí. Arranca páginas de revistas de diseño de interiores, toma fotos de lobbies de hoteles, estéticas de restaurantes o incluso interesantes escaparates que resuenen contigo. Ve más allá de los interiores: incluye imágenes de la naturaleza, la moda, el arte o incluso destinos de viaje que evoquen un ambiente o paleta de colores que desees. El objetivo en esta etapa es el volumen: intenta recopilar al menos de 50 a 100 imágenes en el transcurso de una semana.
Esta colección inicial, sin filtros, debe ser diversa. Incluye fotos de habitaciones completas que capturen un ambiente general, pero también concéntrate en fotos de detalles: el tejido de una tela, la veta de una madera específica, una textura llamativa, detalles arquitectónicos interesantes o combinaciones de colores únicas. Incluso las imágenes abstractas que simplemente transmiten una sensación, quizás un bosque brumoso para un dormitorio sereno, o una vibrante escena callejera para un espacio de sala enérgico, son valiosas.
Después de esta semana de extensa recolección, comienza el verdadero trabajo de claridad: la edición sin piedad. Extiende toda tu colección, ya sea física o digitalmente, y comienza el proceso crítico de selección. Rápidamente notarás hilos comunes emergiendo entre tus imágenes guardadas: temperaturas de color similares (todas cálidas o todas frías), materiales recurrentes (madera natural, metal pulido, ratán), un nivel constante de peso visual (ligero y aireado, o sustancial y arraigado), o un estilo particular (minimalista, maximalista, bohemio). Las imágenes que no encajan en estos patrones emergentes, o que simplemente ya no evocan la misma sensación fuerte, se eliminan. Este proceso de edición decisivo es donde la atracción superficial da paso a una dirección de diseño genuina.
Presta profunda atención a lo que te atrae repetidamente, no a lo que _crees_ que _debería_ gustarte o a lo que está de moda actualmente. Si cada imagen que guardaste presenta tonos de madera cálidos, textiles suaves y acogedores, y luz natural, tu subconsciente te está diciendo algo vital. Escúchalo, incluso si el espíritu del diseño actual se inclina por el minimalismo frío y austero. Tu mood board es un reflejo de _tu_ estética auténtica. Este autodescubrimiento es una parte poderosa del proceso de creación del mood board y ayuda a prevenir la trampa común de diseñar una habitación que se siente a la moda pero, en última instancia, sin alma.
Paso 2: Identifica tu Patrón de Diseño y Define tu Dirección
Una vez que tu colección de inspiración ha sido editada sin piedad hasta tus 15 a 20 imágenes más impactantes, es hora de analizar los patrones que las conectan. Extiéndelas de nuevo y busca los hilos innegables. ¿Qué colores dominan o aparecen consistentemente como acentos? ¿Las texturas son predominantemente rugosas y orgánicas, o suaves y pulidas? ¿La sensación general es acogedora y en capas, o limpia y aireada? ¿Se inclinan hacia elementos de [diseño biofílico](/blog/biophilic-design-guide) o hacia estéticas más industriales?
Ahora, destila estas observaciones en tres a cinco palabras descriptivas poderosas que encapsulen el ambiente o la emoción constante en tus selecciones. Estas no son solo adjetivos; son el cimiento de tu filosofía de diseño para esta habitación. Palabras como "cálido", "terroso", "relajado", "refinado", "dramático", "minimalista", "acogedor", "vibrante" o "sereno" pueden ser excelentes puntos de partida.
Estas palabras descriptivas elegidas se convierten en tu filtro de diseño definitivo y en el marco para la toma de decisiones. Cada decisión futura, desde el cojín más pequeño hasta la lámpara más grande, desde la elección del piso hasta el estilo de los tratamientos de ventana, debe ser puesta a prueba contra estas palabras. Si tus principios rectores son "cálido, texturizado y arraigado" y te encuentras considerando una mesa de centro elegante de cromo brillante, tu mood board señala instantáneamente un conflicto. Este filtro es un poderoso antídoto contra la sobrecarga de opciones; las investigaciones sugieren que demasiadas opciones pueden llevar a la "parálisis por decisión", con algunos estudios indicando que los consumidores que enfrentan más de 20 opciones son significativamente menos propensos a realizar una compra. Tu mood board, destilado en estas palabras clave, se convierte en un camino claro a través del laberinto de infinitas opciones de diseño de interiores, ahorrándote horas de indecisión en tiendas y en línea.
Paso 3: Armar el Tablero — Enfoques Físicos o Digitales
Con tu inspiración central identificada y tus principios rectores definidos, es hora de armar tu mood board física o digitalmente. Cada formato ofrece ventajas distintas, y la mejor elección depende de tu preferencia y las necesidades del proyecto.
**Para un Mood Board Físico:** Opta por un cartón pluma grande, un tablero de corcho o incluso una sección de una pared en blanco. Este enfoque táctil te permite interactuar con tus materiales de una manera muy directa. Imprime tus imágenes seleccionadas, asegurando una buena fidelidad de color. Reúne muestras físicas reales: muestras de tela (¡pínchalas!), muestras de pintura de marcas como Benjamin Moore o Sherwin-Williams, pequeñas muestras de materiales como chapas de madera, baldosas de piedra o muestras de papel tapiz. Organiza todo hasta que se sienta cohesivo y visualmente equilibrado.
Los beneficios de un tablero físico son significativos: puedes tocar las texturas, ver los colores verdaderos sin distorsión de pantalla y experimentar la interacción de la luz en diferentes superficies. Es una experiencia sensorial que los tableros digitales no pueden replicar completamente. Esto es particularmente valioso para paletas de materiales complejas o al [elegir esquemas de color para salas](/blog/color-schemes-for-living-rooms).
**Para un Mood Board Digital:** Herramientas potentes e intuitivas como Canva, Milanote, InVision Freehand o incluso un tablero secreto dedicado de Pinterest ofrecen excelentes plataformas para mood boards digitales. Puedes arrastrar y soltar fácilmente imágenes, muestras de color, texto e incluso enlaces a productos específicos.
Los tableros digitales destacan por su capacidad de ser compartidos, su flexibilidad y facilidad de actualización. Son perfectos para colaborar con otros o para un proyecto que puede evolucionar con el tiempo. Puedes reorganizar elementos sin fin, redimensionar imágenes y experimentar con diferentes composiciones sin hacer un compromiso permanente. Muchos profesionales utilizan software sofisticado como Adobe InDesign o Photoshop para presentaciones digitales muy pulidas. Sea cual sea el formato que elijas, organiza tus imágenes con una jerarquía intencional. Las imágenes más grandes deben representar tu estética dominante o un punto focal clave, con imágenes más pequeñas que muestren detalles de apoyo, colores de acento, texturas e inspiraciones de productos específicos.
Paso 4: Agrega los Detalles Específicos que lo Hacen Accionable
Un mood board trasciende ser simplemente una visión abstracta para convertirse en un documento de trabajo verdaderamente invaluable cuando comienzas a superponer detalles concretos. Aquí es donde la inspiración emocional se conecta directamente con la aplicación práctica.
En lugar de solo bloques de color generales, agrega muestras de pintura reales con sus nombres específicos y códigos de marca de fabricantes como Farrow & Ball, Behr o PPG. Incluye capturas de pantalla o imágenes recortadas de muebles reales que estás considerando, anotando sus dimensiones, posibles acabados y precios aproximados. Si tu proyecto involucra tapicería, adjunta muestras de tela reales o imágenes de alta resolución de los textiles elegidos. Integra muestras de piso (madera, baldosas, alfombra), ejemplos de luminarias, estilos de tratamientos de ventana e incluso acabados de herrajes (por ejemplo, manijas de latón cepillado versus tiradores negros mate).
Crucialmente, anota las dimensiones y los precios aproximados junto a los artículos específicos. Esto transforma tu mood board de una colección de fotos bonitas en un plano potente y cuantificable para tu habitación. Deberías poder entregar este documento exhaustivo a un contratista, a un vendedor de muebles o incluso a una pareja y que entiendan con precisión lo que buscas, tus consideraciones de presupuesto y el alcance general del proyecto, a menudo sin requerir ninguna explicación verbal. Este nivel de detalle reduce drásticamente la falta de comunicación y asegura que todos estén literalmente en la misma página. Al planificar elementos como las [tendencias de diseño de muebles curvos](/blog/curved-furniture-design-trend) o los [mejores colores de pintura para 2026](/blog/best-paint-colors-2026), estos detalles se vuelven indispensables.
Paso 5: Valida tu Dirección Antes de Comprometerte
Antes de realizar compras significativas o finalizar decisiones de diseño, es esencial poner a prueba tu mood board. Este paso de validación es crucial para la confianza y para evitar dudas persistentes.
Primero, muestra tu mood board a alguien cuyo gusto confías, un amigo, familiar o incluso un diseñador profesional. Pregúntales qué sensación o ambiente perciben de él. Si su reacción se alinea perfectamente con tu intención (por ejemplo, buscabas "sereno y sofisticado" y dicen: "¡Vaya, esto se siente tan pacífico y elegante!"), sin duda estás en el camino correcto. Si perciben algo completamente diferente, es una clara señal de que podrías necesitar revisar tu tablero, refinar tus selecciones o ajustar tus palabras guía. Un par de ojos frescos a menudo puede detectar inconsistencias a las que te has vuelto ciego.
Más allá de la retroalimentación humana, la era moderna ofrece una validación sin igual a través de herramientas de visualización con IA. Plataformas como Habitas pueden tomar la dirección de tu mood board meticulosamente curada y generar vistas previas fotorrealistas de cómo se vería tu _habitación real_ con esas opciones específicas aplicadas. Imagina ver el color de pintura elegido en tus paredes, tu sofá seleccionado en la esquina de tu sala y tu piso preferido bajo tus pies, todo renderizado con una precisión increíble. Esta es la máxima evolución de un renderizado de diseñador, pero en lugar de semanas de idas y venidas, lo que solía tomar semanas de trabajo de diseño tradicional ahora se puede lograr en minutos con la visualización con IA, ahorrando a los clientes un promedio de 10 a 15 horas de tiempo de consulta de diseño por habitación.
Herramientas como Habitas te permiten subir una foto de tu habitación existente y aplicar virtualmente los elementos de tu mood board, transformando instantáneamente la inspiración abstracta en realidad concreta. Puedes "ver" tu visión en contexto, experimentar con diferentes arreglos usando una [herramienta de IA para distribución de muebles](/blog/ai-furniture-arrangement-tool) e incluso probar variaciones de tu mood board antes de comprometerte con cualquier compra. Los propietarios que utilizan herramientas de visualización 3D reportan un aumento del 70% en la confianza en sus elecciones de diseño antes de comprar. Esta capacidad sin igual de ver tu habitación específica transformada según tu mood board es el paso de validación definitivo, convirtiendo la inspiración abstracta en confianza innegable y reduciendo significativamente el riesgo de arrepentimiento de diseño. Para más información sobre esta tecnología, explora [cómo funciona el diseño de interiores con IA](/blog/ai-interior-design-how-it-works) y cómo crea [diseños de habitaciones generados por IA que son verdaderamente realistas](/blog/ai-generated-room-designs-realistic).
Consejos Avanzados para Mood Boards que Ofrecen Perspectivas Más Profundas
Si bien los pasos anteriores proporcionan un marco robusto, aquí hay algunos consejos avanzados para elevar tu mood board de bueno a excepcional:
- **Considera Elementos Sensoriales Más Allá de lo Visual:** Si bien un mood board es principalmente visual, intenta incorporar otros sentidos conceptualmente. Si tu tablero sugiere "acogedor", piensa en aromas (vainilla, cedro), sonidos (música suave, fuego crepitante) o sensaciones táctiles (alfombra mullida, manta suave). Aunque no puedes _poner_ un aroma en un tablero, reconocer estos elementos te ayuda a construir un espacio verdaderamente inmersivo. - **Equilibra Escala y Proporción:** A medida que agregas detalles en el Paso 4, presta atención a cómo se relacionarían en tamaño las diferentes piezas de mobiliario y objetos dentro de tu habitación real. Una pequeña muestra en un tablero puede parecer insignificante, pero un sofá grande en la realidad puede dominar una habitación. Usa tu mood board para asegurar un equilibrio armonioso de elementos grandes, medianos y pequeños. - **Cuenta una Historia:** Cada habitación bien diseñada cuenta una historia. ¿Qué narrativa transmite tu mood board? ¿Es una historia de aventura y descubrimiento, o de quietud e introspección? Identificar esta narrativa te ayuda a seleccionar piezas únicas que contribuyan a la trama general de tu espacio. - **Abraza el Contraste:** No permitas que tu mood board se vuelva monótono. Si bien la cohesión es clave, los contrastes sutiles en textura, brillo o escala pueden añadir profundidad e interés. Por ejemplo, si tu estética dominante es suave y orgánica, un único acento metálico elegante puede ser increíblemente impactante. - **Revisa con Diferente Iluminación:** Si tienes un mood board físico, obsérvalo en diversas condiciones de iluminación a lo largo del día: luz natural diurna, luz nublada y luz artificial nocturna. Los colores y las texturas pueden verse drásticamente diferentes, ayudándote a anticipar cómo se sentirá tu habitación en diferentes momentos.
Siguiendo estos pasos e incorporando técnicas avanzadas, tu mood board se convertirá en una herramienta indispensable, guiándote con confianza a través del emocionante viaje de transformar tu hogar. Los hogares que reflejan una estética de diseño cohesiva y bien planificada a menudo generan mayor atractivo, con espacios diseñados profesionalmente que pueden aumentar el valor percibido de la propiedad entre un 5% y un 10%.
Preguntas Frecuentes
### ¿Cuál es la diferencia entre un mood board y un design board?
Aunque a menudo se usan indistintamente, existe una distinción sutil pero importante. Un mood board es típicamente conceptual, centrado en la _sensación_, la estética y el ambiente general de un espacio a través de una colección de imágenes inspiradoras, colores y texturas. Se trata de establecer el tono emocional. Un design board (a veces llamado tablero de concepto o tablero de e-diseño) es más prescriptivo y accionable. Se basa en el mood board incorporando selecciones de productos específicos (muebles reales, iluminación, colores de pintura con códigos y muestras de materiales), lo que lo convierte en una guía directa para la compra e implementación.
### ¿Cuántas imágenes debo poner en un mood board?
Para la fase inicial de recopilación de inspiración (Paso 1), busca una amplia colección de 50 a 100 imágenes. Después de la fase de edición sin piedad, tu mood board central debe incluir típicamente entre 15 y 25 imágenes seleccionadas. Esto permite suficiente información visual para transmitir tu dirección sin abrumar al espectador o diluir tu mensaje central. La clave es la calidad y la relevancia por encima de la cantidad.
### ¿Puedo crear un mood board si no soy bueno en diseño?
¡Absolutamente! Los mood boards son una herramienta intuitiva y accesible para todos, independientemente de la experiencia en diseño. El proceso se trata de descubrir tus preferencias personales y comunicarlas visualmente, no se trata de habilidades de diseño profesional. Empieza guardando todo lo que amas, incluso si no sabes _por qué_ lo amas. Los patrones surgirán naturalmente. Herramientas como Pinterest y Habitas hacen que el proceso sea increíblemente fácil y permisivo, empoderando a cualquiera para visualizar su espacio ideal.
### ¿Cuánto tiempo lleva crear un mood board?
La inversión de tiempo puede variar. La fase inicial de recopilación de inspiración (Paso 1) se realiza mejor durante 3 a 7 días para permitir un descubrimiento orgánico. La edición y el montaje del tablero central (Pasos 2 y 3) pueden completarse típicamente en 2 a 4 horas. Añadir detalles y validar (Pasos 4 y 5) podría tomar otras 1 a 3 horas, dependiendo de cuántos detalles incluyas. En total, espera dedicar entre 5 y 10 horas durante una o dos semanas para un mood board completo y efectivo. Esta inversión inicial reduce significativamente el tiempo gastado en errores costosos más adelante.
### ¿Cuáles son los errores comunes a evitar al crear un mood board?
Un error común es _filtrar demasiado pronto_, impidiendo la inspiración diversa. Otro es _la falta de edición sin piedad_, lo que lleva a un tablero desordenado o inconsistente. _No incluir elementos específicos y accionables_ en el Paso 4 lo hace menos útil. Finalmente, _saltarse el paso de validación_ significa que te pierdes la retroalimentación crítica y el aumento de confianza de la visualización con IA. Recuerda, un mood board es un documento vivo; está bien refinarlo a medida que tu visión se solidifica.