Designer's Guide: Styling Shelves & Bookcases for a Curated Look
Unlock the professional formula for styling shelves and bookcases. Master arranging books, objects, plants, and negative space with the triangle technique for a high-end, curated interior.
Why Shelf Styling Matters: The Impact of a Thoughtfully Curated Space
A beautifully styled shelf or bookcase isn't just about aesthetics; it's about telling a story, reflecting personality, and elevating the entire ambiance of a room. In interior design, these surfaces offer a crucial opportunity to infuse warmth, character, and visual interest into your home. Neglected or cluttered shelves, conversely, can make a space feel disorganized, chaotic, and even smaller. Think of your shelves as mini-galleries, each vignette a curated moment designed to engage the eye and evoke a sense of calm sophistication.
While the concept might seem daunting, especially if you're battling overflowing books or a collection of disparate knick-knacks, the truth is that professional-level shelf styling follows a clear, repeatable formula. It's a blend of art and science, leveraging principles of balance, scale, and rhythm to create displays that look effortlessly chic. And with innovative tools like Habitas, you can even visualize different styling approaches in your actual room photo before lifting a single item, ensuring your vision comes to life perfectly.
The Designer's Core Formula: Books, Objects, Plants, and Space
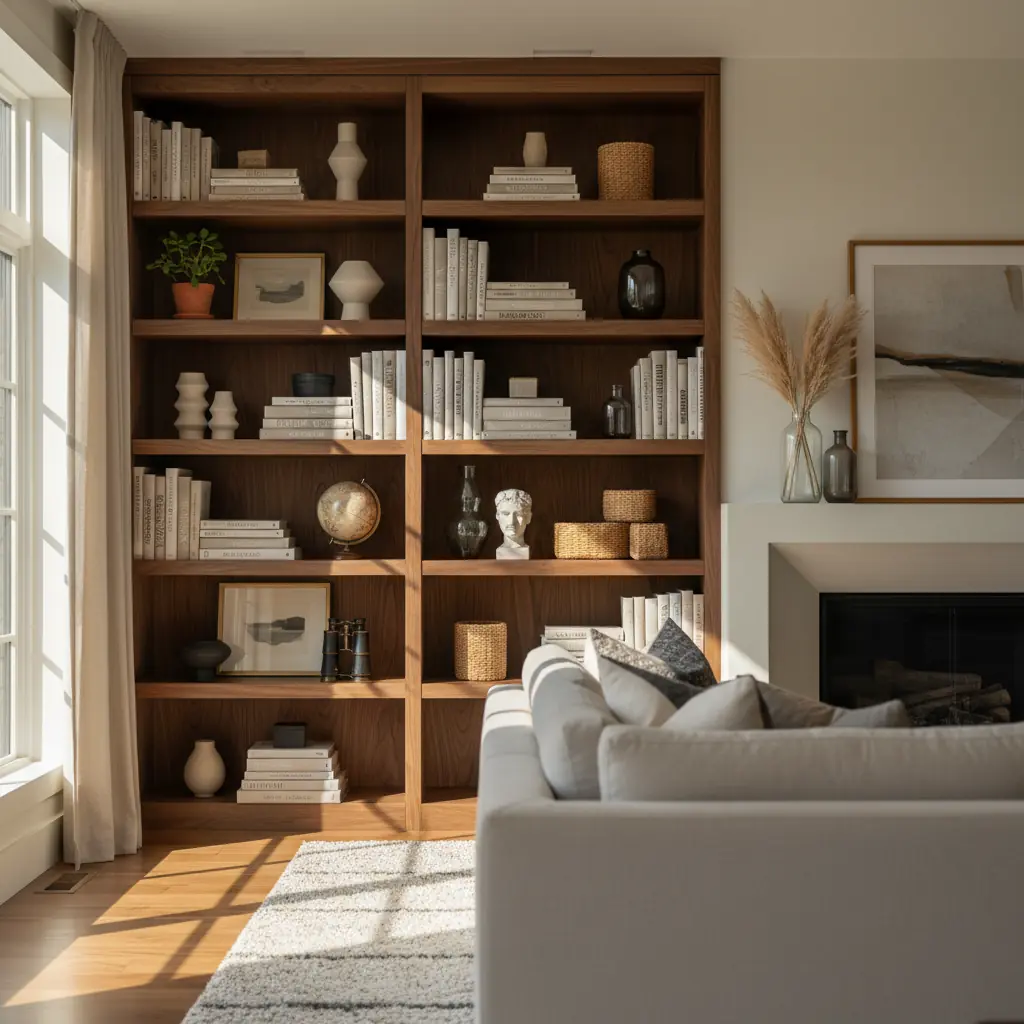
Every beautifully styled bookcase or set of open shelves, from minimalist modern to eclectic bohemian, adheres to the same fundamental recipe: books for intellectual substance and warmth, objects for personality and visual texture, plants for a touch of living energy, and negative space for essential breathing room. These four elements, when combined in the right proportions and thoughtfully arranged, transform ordinary storage into an extraordinary display that feels both intentionally curated and deeply personal.
The most prevalent mistake people make is viewing shelves solely as storage solutions rather than as prime display opportunities. A bookcase crammed wall-to-wall with books, while functional, tends to evoke a library archive rather than a welcoming living space. Conversely, a shelf featuring only decorative objects can feel impersonal, akin to a retail display. The true magic lies in the nuanced mix – and, perhaps even more importantly, in the strategic elements you choose to _omit_. This balance is crucial; studies show that well-staged homes, which inherently include thoughtfully styled shelves, sell on average 25% faster than unstaged properties, underscoring the tangible impact of visual presentation.
Step 1: Declutter & Reset – Starting Your Shelf Styling Journey Fresh
Before you begin the exciting part of arranging, the most crucial first step is to completely clear your canvas. Remove every single item from your shelves. This might feel extreme, but it's essential for a true reset. Once empty, clean the shelves thoroughly. Dust and grime accumulate in ways that go unnoticed when obscured by objects, and a pristine base sets the stage for a polished final look.
With your shelves gleaming, the next phase is critical: honest curation. Lay every item you are _considering_ returning to the shelves on the floor in front of the bookcase. This panoramic view helps you assess your collection objectively. Be honest with yourself:
- **The Sentimental vs. The Aesthetic:** Is that souvenir from a trip you barely remember truly adding aesthetic value, or is it just taking up space? - **Outdated Accolades:** Those awards from a job you left five years ago might hold memories, but do they fit your current home's aesthetic? - **Unread Books:** Books you'll never read again can be donated, freeing up valuable visual real estate for treasured reads or decorative elements.
Group similar items together: books in one pile, decorative objects in another, photos and frames in a third. Seeing everything at once helps you identify what you truly have to work with, recognize any gaps you might want to fill, and most importantly, practice the art of thoughtful editing. This decluttering step alone can reduce visual stress and make your space feel significantly calmer. In fact, research suggests that decluttering can reduce household clutter by up to 40%, directly contributing to a greater sense of well-being and visual harmony in your living environment.
Step 2: Placing Your Books with Intention – Beyond Just Stacking
Books are undeniably the backbone of any bookcase, providing structure, personality, and a sense of history. However, _how_ you arrange them is just as impactful as _which_ books you choose to display. The goal is to create visual rhythm and interest, avoiding a monolithic wall of spines.
**Varying Orientation:** A key technique is to mix vertical sections with horizontal stacks. Horizontal stacks, typically comprising three to five books, serve multiple purposes:
- They create natural platforms for small decorative objects, acting as mini pedestals. - They effectively break up the monotony of an all-vertical arrangement, guiding the eye across the shelves. - They introduce dynamic visual tension and movement.
**Strategic Grouping:** When arranging vertical sections, move beyond strict alphabetical or genre-based organization. For a more polished aesthetic, consider these approaches:
- **By Size:** Group books of similar heights together. A row of similarly sized art books or novels creates a cohesive, tidy look. You can also create a gentle arc by placing the tallest books at the ends of a section, gradually tapering to shorter books in the middle. - **By Color Range:** This doesn't mean extreme color-blocking unless that's your specific aesthetic. Instead, think about cohesive color _ranges_. For example, a section of books with muted blues, greens, and grays can look far more polished than a random assortment of clashing spine colors. If you find some books have particularly vibrant or clashing spines, you can turn them around so the pages face outwards for a more subdued, textural look – just be sure you can still easily identify them if you plan to read them! For more guidance on integrating color effectively, explore our post on [color schemes for living rooms](/blog/color-schemes-for-living-rooms). - **By Texture or Material:** Grouping books with linen covers or similar paper qualities can add a tactile dimension.
Remember, not every shelf needs to be completely full. In fact, some of the most impactful displays feature negative space. A single, horizontal stack of three beautiful books on an otherwise empty shelf can create a powerful "moment of calm," making the fuller shelves nearby look more intentional and curated, rather than just crowded.
Step 3: Integrating Objects and Organic Elements – Adding Personality and Life
Once your books are thoughtfully placed, it's time to infuse personality and visual interest with decorative objects and the vibrant touch of nature.
**The Art of Object Placement:** Place decorative objects next to and on top of your book arrangements, using the horizontal stacks as natural pedestals. The cardinal rule here is **height variation**. Objects at different heights create visual rhythm and prevent the eye from getting stuck.
- A tall ceramic vase standing proudly next to a short stack of books. - A medium-height sculpture or art object on a different shelf. - A small framed photo propped against a book spine, adding a personal touch. - Consider the "rule of three" for objects: groups of three (or any odd number) are inherently more visually appealing and balanced than even numbers. Group smaller items on a decorative tray or in a bowl to create a single, more impactful vignette.
**Adding Organic Life:** To truly bring your shelves to life, incorporate at least one plant or organic element for every two to three shelves. This isn't just about aesthetics; it's about connecting with nature, a core principle of [biophilic design](/blog/biophilic-design-guide).
- **Trailing Plants:** A pothos or philodendron cascading gracefully from an upper shelf adds softness and movement. - **Upright Plants:** A small snake plant or ZZ plant on a middle shelf provides architectural interest. - **Small Succulents:** These are perfect for lower-light conditions or smaller spaces. - **Dried Botanicals:** If real plants aren't practical due to light conditions or maintenance, high-quality dried botanicals like eucalyptus stems, pampas grass, or dried flowers offer texture and natural beauty without the upkeep. Learn more about selecting the [best plants for interior design](/blog/best-plants-for-interior-design) to suit your space and lighting.
These living (or preserved) elements introduce a softness and dynamic quality that no amount of ceramics and books alone can replicate, creating a more inviting and harmonious environment.
Step 4: Mastering the Triangle Technique & The Power of Negative Space
These two advanced techniques are the professional secrets that truly elevate shelf styling from simple arrangement to intentional design, creating cohesive, visually compelling displays.
**The Triangle Technique:** This is the unseen force that makes your shelves feel professionally composed across their entire height. The concept is simple: place three similar items – sharing a common color, material, shape, or thematic thread – in a triangular arrangement across different shelves.
- **Color Triangles:** For instance, three blue objects: a cobalt vase on the top left shelf, a small navy book stack in the center of a middle shelf, and a ceramic bowl with blue accents on the lower right. - **Material Triangles:** Consider three items of wood or brass, strategically positioned. - **Shape Triangles:** Three round objects, or three angular pieces, distributed to create visual flow.
Your eye unconsciously connects these points, creating a sense of balanced composition and guiding the viewer's gaze effortlessly across the entire bookcase. This technique creates harmony and prevents any single shelf from feeling isolated from the whole.
**The Indispensable Role of Negative Space:** Finally, and perhaps most crucially, embrace negative space. This refers to the empty areas on your shelves. A good rule of thumb is to leave roughly **30 percent of your shelf surface empty**. This isn't wasted space; it's what makes everything else visible, allowing each carefully chosen item to shine.
- **Clarity and Calm:** If every inch is filled, nothing stands out, and the overall effect is overwhelming clutter. Negative space acts as a visual pause, allowing the eye to rest and appreciate the individual pieces. - **Sophistication:** Professional designers understand that less is often more. Strategic emptiness conveys a sense of sophistication and intentionality. - **The "Edit" Test:** After placing each item, step back and ask yourself, "Does this shelf feel better with this item or without it?" When in doubt, leave it out. This discipline is essential for achieving a truly curated look.
By integrating the triangle technique with a mindful approach to negative space, your shelves will transform into dynamic, balanced, and aesthetically pleasing focal points that enhance your entire room. And remember, tools like Habitas allow you to experiment with different arrangements virtually, ensuring your shelves reflect your perfect vision without endless physical rearranging.
Beyond the Basics: Advanced Styling Techniques for the Savvy Designer
Once you've mastered the core formula, consider these advanced techniques to add even more depth and professional polish to your shelf displays.
**1. Creating a Narrative or Theme:** Instead of just a collection of pretty things, consider if your shelves can tell a story. Perhaps a travel theme with global artifacts and travel guides, or a monochromatic theme utilizing various textures within a single color palette. A cohesive narrative makes your shelves feel deeply personal and intentional. For example, a collection of pottery from different regions alongside books on artisanal crafts can create a compelling story about your interests.
**2. Layering for Depth:** Depth is key to making shelves look rich and inviting. Avoid placing all items in a single line at the front of the shelf. Instead, layer objects:
- Place a larger artwork or a decorative plate upright at the back of the shelf. - Lean a framed photo or small print against it. - Position a smaller object (like a candle or a unique rock) in front. This creates a sense of discovery and makes the display feel more dynamic.
**3. Integrated Lighting:** Consider how lighting can enhance your displays. Integrated LED strips beneath shelves, small battery-operated puck lights, or even a strategically placed tiny task lamp can highlight prized objects, create mood lighting, and add an unexpected layer of sophistication, especially in the evenings. This is often overlooked but can dramatically change the perceived value of your display.
**4. The Power of the Backdrop:** The back of your shelves offers another canvas. For built-ins, consider painting the back wall a contrasting color, applying an interesting wallpaper, or even fitting a mirror for added depth and light reflection. For open shelving units, think about what's behind them – a bold accent wall can make your items pop. If you're considering a subtle yet impactful change, explore ideas for an [all-white room design](/blog/all-white-room-design-tips) for a clean backdrop, or a more dramatic [color drenching technique](/blog/color-drenching-technique) for a cohesive, enveloping feel.
**5. Repetition with Variation:** While uniformity is a mistake, strategic repetition of certain elements (color, material, shape) _with variation_ in size or form can create powerful cohesion. For example, a recurring metallic accent (brass candle holders, a gold-framed photo, a small brass bowl) distributed across shelves can tie the entire display together without being monotonous. This technique subtly reinforces your chosen aesthetic.
Sourcing Your Shelf Style: Where to Find Your Treasures
Finding the right pieces for your shelves is part of the fun and can be an ongoing journey. A truly curated shelf blends items from various sources, reflecting your personal taste and adventures.
- **Antique Stores and Flea Markets:** These are treasure troves for unique, one-of-a-kind pieces with history and character. Look for interesting vases, busts, bookends, or vintage ceramics. The thrill of the hunt often yields the most unique finds. - **Local Artisans and Craft Fairs:** Supporting local artists not only brings distinctive, handmade pieces into your home but also tells a story. Look for pottery, sculptures, or textile art. - **Travel Souvenirs:** Rather than generic trinkets, seek out locally crafted items when you travel. A beautiful piece of pottery from Italy or a hand-carved wooden animal from Africa holds memories and adds global flair. - **Online Marketplaces:** Sites like Etsy for handmade goods, or even eBay and Facebook Marketplace for vintage finds, can offer a vast selection. - **Art Galleries and Shops:** Investing in small sculptures or unique art objects can elevate your shelves to a true art display. - **High-Low Mixing:** Don't be afraid to mix high-end, investment pieces with affordable finds. A priceless antique next to a stylish, budget-friendly book can create a sophisticated and approachable look. The key is quality and aesthetic appeal, not price tag. - **Nature:** Collect interesting stones, driftwood, or unique dried leaves to incorporate free, organic elements into your display.
Sourcing your items over time, rather than buying everything at once, allows your shelves to evolve organically with your personal style and experiences, making them truly reflective of you.
Common Mistakes and Quick Fixes in Shelf Styling
Even with the formula in hand, it's easy to fall into common traps. Recognizing these pitfalls and knowing the quick fixes can significantly improve your results.
**1. Overcrowding:**
- **Mistake:** This is the number one styling error. If you can't see the back of the shelf between objects, or if items are touching each other, you have too much. The "breathing room" principle is being ignored. - **Quick Fix:** Remove items, then remove one more. Seriously. Take out everything that doesn't immediately enhance the display. Each piece needs space to be appreciated.
**2. Uniformity and Symmetry:**
- **Mistake:** Everything at the same height, evenly spaced, perfectly symmetrical across shelves. This reads as rigid, static, and predictable rather than dynamic and curated. - **Quick Fix:** Introduce slight asymmetry and height variation. Offsetting groups, varying the number of items on each shelf, and intentionally creating visual tension will make the display more engaging. Balance doesn't mean perfect symmetry; it means visual equilibrium.
**3. Too Many Small Items:**
- **Mistake:** A proliferation of tiny objects scattered individually across shelves creates visual noise and clutter, making the eye jump without finding a focal point. - **Quick Fix:** Group tiny objects together on a small tray, in a decorative bowl, or atop a horizontal stack of books. This consolidates them into a single, more impactful vignette.
**4. Centered Placement:**
- **Mistake:** Placing every object or group perfectly centered on each shelf can feel static and uninspired. - **Quick Fix:** Experiment with offset placement. Anchor items to one side or the other, or use the "rule of thirds" – imagining each shelf divided into three sections and placing items at the intersections. This looks more dynamic and intentional.
**5. Ignoring Scale and Proportion:**
- **Mistake:** Using objects that are either too small (getting lost) or too large (overwhelming the shelf and surrounding items) for the shelf's dimensions. - **Quick Fix:** Vary the scale of your objects but ensure they are appropriate for the shelf. Mix large anchor pieces with medium and small accent items. Ensure no single item dominates disproportionately. This is where an [AI furniture arrangement tool](/blog/ai-furniture-arrangement-tool) can be invaluable, helping you visualize scale before you even bring items home.
By actively addressing these common missteps, you can quickly refine your shelf styling and achieve a professional, curated look that enhances your home's aesthetic.
Frequently Asked Questions
### How do interior designers typically style bookshelves?
Interior designers approach bookshelf styling as a curated art form, not just storage. They follow a formula incorporating books (both vertical and horizontal stacks), decorative objects (with varied heights and textures), plants (for life and softness), and essential negative space (approximately 30% empty). Key techniques include using the "triangle technique" to create visual flow across shelves, grouping similar items, and intentionally mixing scales and textures to avoid uniformity. The goal is to create vignettes that tell a story and reflect the homeowner's personality while maintaining visual balance and sophistication.
### What should you put on shelves besides books?
Beyond books, shelves are ideal for displaying a variety of decorative and personal items that add character and texture. Consider unique ceramic vases, sculptural objects, framed photographs or small artworks, intriguing souvenirs from travels, candles, decorative boxes, and small collections (e.g., specific pottery or glass). Organic elements like trailing plants, succulents, or elegant dried botanicals are crucial for adding life. The key is to select items that vary in height, material, and visual weight to create interest and avoid a flat, cluttered look.
### How do I make my shelves look expensive or high-end?
To make your shelves look high-end, focus on quality over quantity and thoughtful curation. Incorporate a mix of textures (e.g., polished metal, natural wood, rough ceramic), use a cohesive color palette, and introduce subtle luxurious elements like polished stone bookends or unique artisanal pieces. Embrace negative space to give each item room to breathe, preventing a cluttered appearance. Use the triangle technique for sophisticated visual balance. Avoid cheap-looking plastics or mass-produced knick-knacks. Even budget-friendly items can look high-end when meticulously arranged and combined with a few well-chosen statement pieces.
### Should all my books be facing forwards?
While traditionally books are placed with their spines facing forwards for easy identification, designers often vary this for aesthetic purposes. For a softer, more textural, and less visually "busy" look, some choose to turn a portion of books around so their pages face outwards. This creates a neutral, uniform backdrop, emphasizing the texture of the pages rather than clashing spine colors. It's an aesthetic choice that works particularly well in minimalist or neutral-themed spaces, but it does make finding specific titles more challenging. A balanced approach might involve facing most books forward, with a few carefully selected stacks or sections turned around for visual interest.
### How often should I restyle my shelves?
There's no strict rule for how often to restyle shelves, but generally, a refresh every 6-12 months is a good practice. This allows you to rotate seasonal decor, incorporate new acquisitions, or simply adjust the arrangement to reflect evolving tastes and experiences. You might also consider a minor tweak whenever you feel your space needs a lift or if the shelves start to feel cluttered. Think of it as an opportunity to "shop your home" and rediscover items you already own, giving them a new spotlight. Tools like Habitas can even help you quickly visualize new arrangements before you commit to the physical change, making the process faster and more fun.