Libere Sua Visão: Crie o Mood Board de design de Interiores Perfeito
Domine o planejamento de design de interiores com nosso guia passo a passo para criar um mood board. Descubra como reunir inspiração, definir seu estilo, montar seu painel e validar sua visão com ferramentas de IA como Habitas.
O Que É Um Mood Board de design de Interiores e Por Que Ele Economiza Seu Dinheiro e Estresse?
Um mood board de design de interiores é mais do que apenas uma colagem; é uma coleção meticulosamente selecionada de imagens, cores, texturas e materiais, projetada para comunicar a essência emocional e a visão funcional que você deseja que um ambiente incorpore. Longe de ser uma mera lista de compras ou um plano de chão preciso, ele funciona como a declaração visual definitiva para toda a sua direção de design. Pense nele como sua estrela-guia inabalável, orientando cada decisão e evitando que você se desvie do curso quando tentado por tendências passageiras ou vendas sedutoras.
O valor profundo de um mood board bem elaborado reside principalmente em seu poder de prevenir erros caros e a paralisia avassaladora do design. Sem essa etapa fundamental crucial, os proprietários de imóveis frequentemente se veem fazendo compras impulsivas de móveis que não combinam, selecionando cores de tinta que brigam com o piso existente ou acabando com ambientes que parecem uma mistura aleatória de itens bonitos, mas não relacionados. Esses equívocos geralmente levam a devoluções caras, novas compras e o esgotamento emocional de um espaço que nunca parece realmente certo.
Um mood board diligentemente construído detecta esses potenciais conflitos _antes_ que você gaste um único dólar ou se comprometa com grandes mudanças. Ele o força a visualizar a coesão, antecipar desafios e fazer escolhas intencionais. Profissionais de design de interiores concordam amplamente que integrar uma fase sólida de mood board em um projeto pode economizar aos clientes entre 15 e 30 por cento de seu orçamento total, com muitos projetos registrando economias médias mais próximas de 20% ou até $5.000 em uma reforma de ambiente de médio porte. Isso não é apenas sobre dinheiro; é sobre economizar tempo, reduzir o estresse e garantir que você invista em um lar que realmente ame.
Passo 1: Como Reunir Inspiração Amplamente e Depois Editar Sem Piedade
A jornada para o seu ambiente perfeito começa com inspiração ilimitada. Comece salvando absolutamente tudo o que chamar sua atenção, sem qualquer filtro ou julgamento inicial. Mergulhe nos tesouros visuais de plataformas como Pinterest e Instagram, mas não pare por aí. Recorte páginas de revistas de design de interiores, tire fotos de lobbies de hotéis, estéticas de restaurantes ou até mesmo vitrines interessantes que ressoem com você. Vá além dos interiores: inclua imagens da natureza, moda, arte ou até mesmo destinos de viagem que evoquem um clima ou paleta de cores que você deseja. O objetivo nesta fase é volume – procure coletar de 50 a 100 imagens ao longo de uma semana.
Esta coleção inicial e não filtrada deve ser diversa. Inclua fotos de ambientes completos que capturem uma atmosfera geral, mas também se concentre em detalhes: a trama de um tecido, o veio de uma madeira específica, uma textura marcante, detalhes arquitetônicos interessantes ou combinações de cores únicas. Mesmo imagens abstratas que simplesmente transmitam um sentimento – talvez uma floresta nebulosa para um quarto sereno, ou uma cena de rua vibrante para um espaço de convivência energético – são valiosas.
Após esta semana de coleta expansiva, o verdadeiro trabalho de clareza começa: a edição impiedosa. Espalhe toda a sua coleção, seja física ou digitalmente, e inicie o processo crítico de seleção. Você notará rapidamente padrões comuns surgindo entre suas imagens salvas: temperaturas de cor semelhantes (todas quentes ou todas frias), materiais recorrentes (madeira natural, metal polido, rattan), um nível consistente de peso visual (leve e arejado, ou substancial e sólido), ou um estilo particular (minimalista, maximalista, boêmio). As imagens que não se encaixam nesses padrões emergentes, ou que simplesmente não evocam mais a mesma sensação forte, são cortadas. Este processo de edição decisivo é onde a atração superficial dá lugar à direção genuína do design.
Preste profunda atenção ao que você é repetidamente atraído, não ao que você _acha_ que _deveria_ gostar ou o que está atualmente em tendência. Se cada imagem que você salvou apresenta tons de madeira quentes, têxteis macios e convidativos e luz natural, seu subconsciente está lhe dizendo algo vital. Ouça-o, mesmo que o zeitgeist do design atual seja todo sobre minimalismo frio e austero. Seu mood board é um reflexo da _sua_ estética autêntica. Essa autodescoberta é uma parte poderosa do processo de criação de um mood board e ajuda a prevenir a armadilha comum de projetar um ambiente que parece elegante, mas, em última análise, sem alma.
Passo 2: Identifique Seu Padrão de design e Defina Sua Direção
Uma vez que sua coleção de inspiração tenha sido editada impiedosamente para suas 15 a 20 imagens mais impactantes, é hora de analisar os padrões que as conectam. Espalhe-as novamente e procure os fios inegáveis. Que cores dominam ou aparecem consistentemente como detalhes? As texturas são predominantemente ásperas e orgânicas, ou lisas e polidas? A sensação geral é aconchegante e em camadas, ou limpa e arejada? Elas tendem a elementos de [design biofílico](/blog/biophilic-design-guide) ou a estéticas mais industriais?
Agora, destile essas observações em três a cinco palavras descritivas poderosas que encapsulem o clima ou a emoção consistente em suas seleções. Estas não são apenas adjetivos; elas são a base da sua filosofia de design para este ambiente. Palavras como "aconchegante", "terroso", "relaxado", "refinado", "dramático", "minimalista", "convidativo", "vibrante" ou "sereno" podem ser excelentes pontos de partida.
Estas palavras descritivas escolhidas tornam-se seu filtro de design e estrutura de tomada de decisão definitivos. Cada decisão futura – desde a menor almofada decorativa até a maior luminária, da escolha do piso ao estilo das cortinas – deve ser testada contra essas palavras. Se seus princípios orientadores são "aconchegante, texturizado e sólido" e você se vê considerando uma mesa de centro de cromo elegante e brilhante, seu mood board instantaneamente sinaliza um conflito. Este filtro é um poderoso antídoto para a sobrecarga de escolhas; pesquisas sugerem que muitas opções podem levar à "paralisia da decisão", com alguns estudos indicando que consumidores com mais de 20 escolhas são significativamente menos propensos a fazer uma compra. Seu mood board, destilado nessas palavras-chave, torna-se um caminho claro através do labirinto de infinitas opções de design de interiores, economizando horas de indecisão em lojas e online.
Passo 3: Montando o Board — Abordagens Físicas ou Digitais
Com sua inspiração principal identificada e seus princípios orientadores definidos, é hora de montar seu mood board física ou digitalmente. Cada formato oferece vantagens distintas, e a melhor escolha depende de sua preferência e das necessidades do projeto.
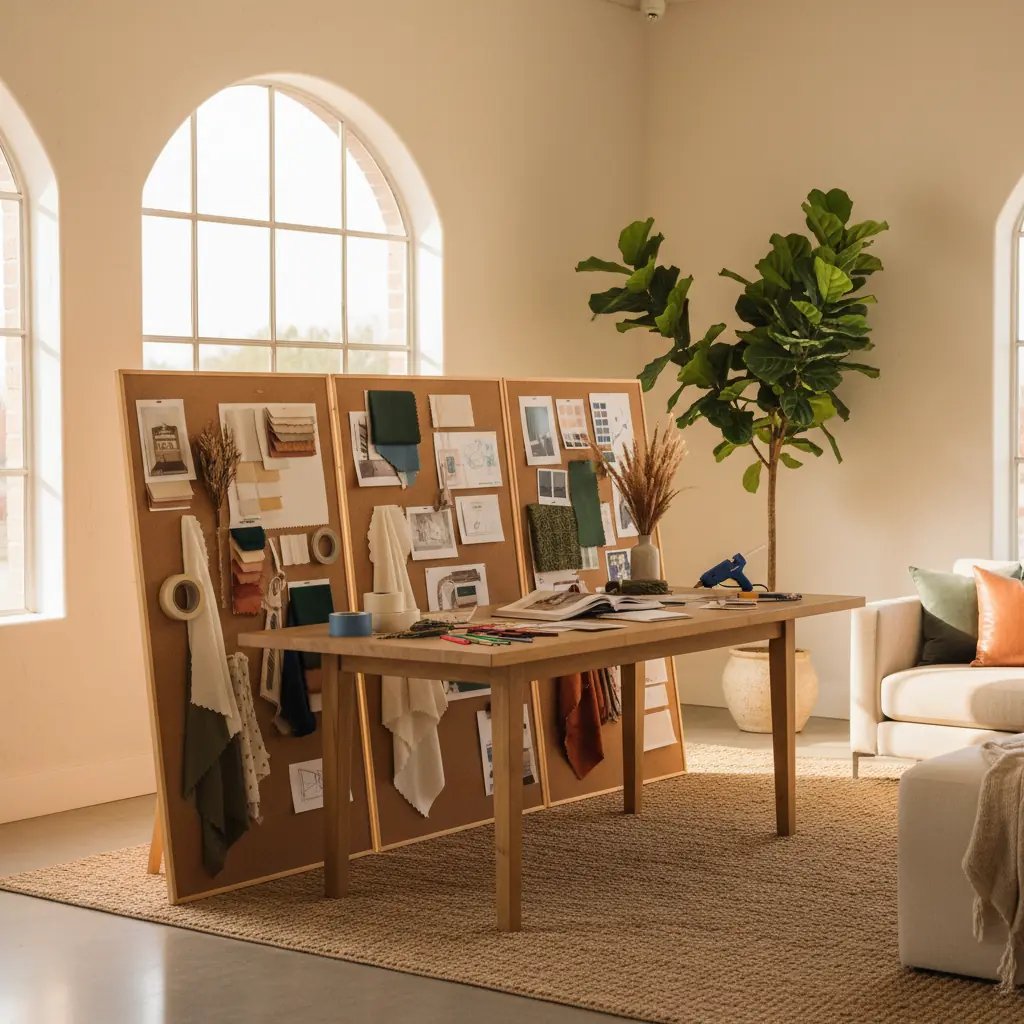
**Para um Mood Board Físico:** Opte por uma placa de espuma, um mural de cortiça ou até mesmo uma seção de uma parede vazia. Esta abordagem tátil permite que você interaja com seus materiais de uma maneira muito direta. Imprima suas imagens selecionadas, garantindo boa fidelidade de cores. Reúna amostras físicas reais: retalhos de tecido (prenda-os!), amostras de tinta de marcas como Benjamin Moore ou Sherwin-Williams, pequenas amostras de materiais como lâminas de madeira, ladrilhos de pedra ou amostras de papel de parede. Organize tudo até que se sinta coeso e visualmente equilibrado.
Os benefícios de um painel físico são significativos: você pode tocar as texturas, ver as cores verdadeiras sem distorção da tela e experimentar a interação da luz em diferentes superfícies. É uma experiência sensorial que os painéis digitais não conseguem replicar totalmente. Isso é particularmente valioso para paletas de materiais complexas ou ao [escolher esquemas de cores para salas de estar](/blog/color-schemes-for-living-rooms).
**Para um Mood Board Digital:** Ferramentas poderosas e intuitivas como Canva, Milanote, InVision Freehand, ou até mesmo um painel secreto dedicado no Pinterest oferecem excelentes plataformas para mood boards digitais. Você pode facilmente arrastar e soltar imagens, amostras de cores, texto e até mesmo links para produtos específicos.
Os painéis digitais se destacam em compartilhamento, flexibilidade e capacidade de atualização. São perfeitos para colaborar com outras pessoas ou para um projeto que pode evoluir ao longo do tempo. Você pode reorganizar elementos infinitamente, redimensionar imagens e experimentar diferentes composições sem fazer um compromisso permanente. Muitos profissionais usam softwares sofisticados como Adobe InDesign ou Photoshop para apresentações digitais altamente elaboradas. Seja qual for o formato escolhido, organize suas imagens com uma hierarquia intencional. As imagens maiores devem representar sua estética dominante ou um ponto focal chave, com imagens menores mostrando detalhes de apoio, cores de destaque, texturas e inspirações de produtos específicos.
Passo 4: Adicione os Detalhes Específicos Que O Tornam Acionável
Um mood board transcende ser meramente uma visão abstrata para se tornar um documento de trabalho verdadeiramente inestimável quando você começa a adicionar especificações concretas. É aqui que a inspiração emocional se conecta diretamente à aplicação prática.
Em vez de apenas blocos de cores gerais, adicione amostras de tinta reais com seus nomes específicos e códigos de marca de fabricantes como Farrow & Ball, Behr ou PPG. Inclua capturas de tela ou imagens recortadas de peças de mobiliário reais que você está considerando, anotando suas dimensões, acabamentos potenciais e preços aproximados. Se seu projeto envolver estofamento, anexe amostras de tecido reais ou imagens de alta resolução dos têxteis escolhidos. Integre amostras de piso (madeira, azulejo, carpete), exemplos de luminárias, estilos de tratamentos de janela e até acabamentos de ferragens (por exemplo, puxadores de latão escovado vs. puxadores pretos foscos).
Crucialmente, anote as dimensões e os preços aproximados ao lado de itens específicos. Isso transforma seu mood board de uma coleção de belas imagens em um poderoso e quantificável projeto para seu ambiente. Você deve ser capaz de entregar este documento abrangente a um empreiteiro, um vendedor de móveis ou até mesmo um parceiro e fazer com que eles entendam precisamente o que você busca, suas considerações orçamentárias e o escopo geral do projeto, muitas vezes sem a necessidade de qualquer explicação verbal. Este nível de detalhe reduz drasticamente a má comunicação e garante que todos estejam literalmente na mesma página. Ao planejar elementos como [tendências de design de móveis curvos](/blog/curved-furniture-design-trend) ou [as melhores cores de tinta para 2026](/blog/best-paint-colors-2026), esses detalhes se tornam indispensáveis.
Passo 5: Valide Sua Direção Antes de Se Comprometer
Antes de fazer qualquer compra significativa ou finalizar decisões de design, é essencial testar seu mood board. Esta etapa de validação é crucial para a confiança e para evitar quaisquer dúvidas persistentes.
Primeiro, mostre seu mood board a alguém cujo gosto você confia – um amigo, familiar ou até mesmo um designer profissional. Pergunte a eles qual sentimento ou atmosfera eles percebem. Se a reação deles se alinha perfeitamente com sua intenção (por exemplo, você almejava "sereno e sofisticado" e eles dizem: "Uau, isso parece tão tranquilo e elegante!"), você está, sem dúvida, no caminho certo. Se eles perceberem algo completamente diferente, é um sinal claro de que você pode precisar revisar seu painel, refinar suas seleções ou ajustar suas palavras-guia. Um novo par de olhos pode muitas vezes detectar inconsistências às quais você se tornou cego.
Além do feedback humano, a era moderna oferece validação incomparável através de ferramentas de visualização de IA. Plataformas como Habitas podem pegar a direção do seu mood board meticulosamente curado e gerar pré-visualizações fotorrealistas de como seu _ambiente real_ ficaria com essas escolhas específicas aplicadas. Imagine ver a cor de tinta escolhida em suas paredes, seu sofá selecionado no canto da sala de estar e seu piso preferido sob os pés – tudo renderizado com incrível precisão. Esta é a evolução máxima de uma renderização de design, mas em vez de semanas de idas e vindas, o que costumava levar semanas de trabalho de design tradicional agora pode ser alcançado em minutos com a visualização de IA, economizando aos clientes uma média de 10-15 horas de tempo de consulta de design por ambiente.
Ferramentas como Habitas permitem que você carregue uma foto do seu ambiente existente e aplique virtualmente os elementos do seu mood board, transformando instantaneamente a inspiração abstrata em realidade concreta. Você consegue "ver" sua visão em contexto, experimentar diferentes arranjos usando uma [ferramenta de arranjo de móveis com IA](/blog/ai-furniture-arrangement-tool), e até mesmo testar variações do seu mood board antes de se comprometer com quaisquer compras. Proprietários de imóveis que utilizam ferramentas de visualização 3D relatam um aumento de 70% na confiança em suas escolhas de design antes de comprar. Essa capacidade incomparável de ver seu ambiente específico transformado de acordo com seu mood board é a etapa de validação definitiva, transformando a inspiração abstrata em confiança inegável e reduzindo significativamente o risco de arrependimento de design. Para saber mais sobre essa tecnologia, explore [como funciona o design de interiores com IA](/blog/ai-interior-design-how-it-works) e como ele cria [designs de ambientes gerados por IA que são verdadeiramente realistas](/blog/ai-generated-room-designs-realistic).
Dicas Avançadas de Mood Board para Insights Mais Profundos
Embora as etapas acima forneçam uma estrutura robusta, aqui estão algumas dicas avançadas para elevar seu mood board de bom a excepcional:
- **Considere Elementos Sensoriais Além dos Visuais:** Embora um mood board seja principalmente visual, tente incorporar outros sentidos conceitualmente. Se o seu painel sugere "aconchego", pense em aromas (baunilha, cedro), sons (música suave, fogo crepitante) ou sensações táteis (tapete macio, cobertor felpudo). Embora você não possa _colocar_ um aroma em um painel, reconhecer esses elementos ajuda você a construir um espaço verdadeiramente imersivo. - **Equilibre Escala e Proporção:** Ao adicionar especificações no Passo 4, preste atenção em como diferentes peças de mobiliário e objetos se relacionariam em tamanho dentro do seu ambiente real. Uma pequena amostra em um painel pode parecer insignificante, mas um sofá grande na realidade pode dominar um ambiente. Use seu mood board para garantir um equilíbrio harmonioso de elementos grandes, médios e pequenos. - **Conte uma História:** Todo ambiente bem projetado conta uma história. Que narrativa seu mood board transmite? É uma história de aventura e descoberta, ou de quietude e introspecção? Identificar essa narrativa ajuda você a selecionar peças únicas que contribuem para o enredo geral do seu espaço. - **Abrace o Contraste:** Não deixe seu mood board se tornar monótono. Embora a coesão seja fundamental, contrastes sutis em textura, brilho ou escala podem adicionar profundidade e interesse. Por exemplo, se sua estética dominante é suave e orgânica, um único toque metálico elegante pode ser incrivelmente impactante. - **Revise em Diferentes Iluminações:** Se você tiver um mood board físico, observe-o em várias condições de iluminação ao longo do dia – luz natural do dia, luz nublada e luz artificial noturna. Cores e texturas podem parecer dramaticamente diferentes, ajudando você a antecipar como seu ambiente se sentirá em diferentes momentos.
Seguindo estas etapas e incorporando técnicas avançadas, seu mood board se tornará uma ferramenta indispensável, guiando-o com confiança pela emocionante jornada de transformar sua casa. Lares que refletem uma estética de design coesa e bem planejada geralmente possuem maior apelo, com espaços profissionalmente projetados potencialmente aumentando o valor percebido da propriedade em 5-10%.
Perguntas Frequentes
### Qual a diferença entre um mood board e um design board?
Embora frequentemente usados de forma intercambiável, há uma distinção sutil, mas importante. Um mood board é tipicamente conceitual, focando no _sentimento_, na estética e na atmosfera geral de um espaço através de uma coleção de imagens inspiradoras, cores e texturas. Trata-se de definir o tom emocional. Um design board (às vezes chamado de painel de conceito ou e-design board) é mais prescritivo e acionável. Ele se baseia no mood board, incorporando seleções específicas de produtos – móveis reais, iluminação, cores de tinta com códigos e amostras de materiais – tornando-o um guia direto para compra e implementação.
### Quantas imagens devo colocar em um mood board?
Para a fase inicial de coleta de inspiração (Passo 1), almeje uma vasta coleção de 50 a 100 imagens. Após a fase de edição rigorosa, seu mood board principal deve tipicamente apresentar 15 a 25 imagens selecionadas. Isso permite informação visual suficiente para transmitir sua direção sem sobrecarregar o espectador ou diluir sua mensagem central. A chave é qualidade e relevância sobre a quantidade.
### Posso criar um mood board se não sou bom em design?
Com certeza! Mood boards são uma ferramenta intuitiva e acessível para todos, independentemente da experiência em design. O processo é sobre descobrir suas preferências pessoais e comunicá-las visualmente, não sobre habilidades de design profissionais. Comece salvando tudo o que você ama, mesmo que não saiba _por que_ você ama. Os padrões surgirão naturalmente. Ferramentas como Pinterest e Habitas tornam o processo incrivelmente fácil e flexível, capacitando qualquer pessoa a visualizar seu espaço ideal.
### Quanto tempo leva para criar um mood board?
O investimento de tempo pode variar. A fase inicial de coleta de inspiração (Passo 1) é melhor realizada ao longo de 3 a 7 dias para permitir uma descoberta orgânica. A edição e montagem do mood board principal (Passos 2 e 3) podem ser concluídas geralmente em 2 a 4 horas. Adicionar especificações e validar (Passos 4 e 5) pode levar mais 1 a 3 horas, dependendo de quantos detalhes você incluir. No total, espere dedicar cerca de 5 a 10 horas ao longo de uma ou duas semanas para um mood board completo e eficaz. Este investimento inicial reduz significativamente o tempo gasto em erros custosos posteriormente.
### Quais são os erros comuns a evitar ao criar um mood board?
Um erro comum é _filtrar demais muito cedo_, impedindo uma inspiração diversa. Outro é a _falta de edição impiedosa_, levando a um painel desorganizado ou inconsistente. _Não incluir itens acionáveis específicos_ no Passo 4 o torna menos útil. Finalmente, _pular a etapa de validação_ significa que você perde feedback crítico e o impulso de confiança da visualização por IA. Lembre-se, um mood board é um documento vivo; tudo bem refiná-lo à medida que sua visão se solidifica.